|
This week I mixed a R&B tune with a lot of great vocal harmonies and layers. Some of the harmonies were a little off key, so I practiced my autotune skills in order to tighten up the harmonies. Autotune can be overwhelming at first, the interface has lots of buttons and knobs that aren't completely clear as to what they control or adjust. But after playing around with it for a bit, I was able to get some pretty convincing results. Here is a screenshot of what the autotune window looks like while operating in real time on the lead vocal.
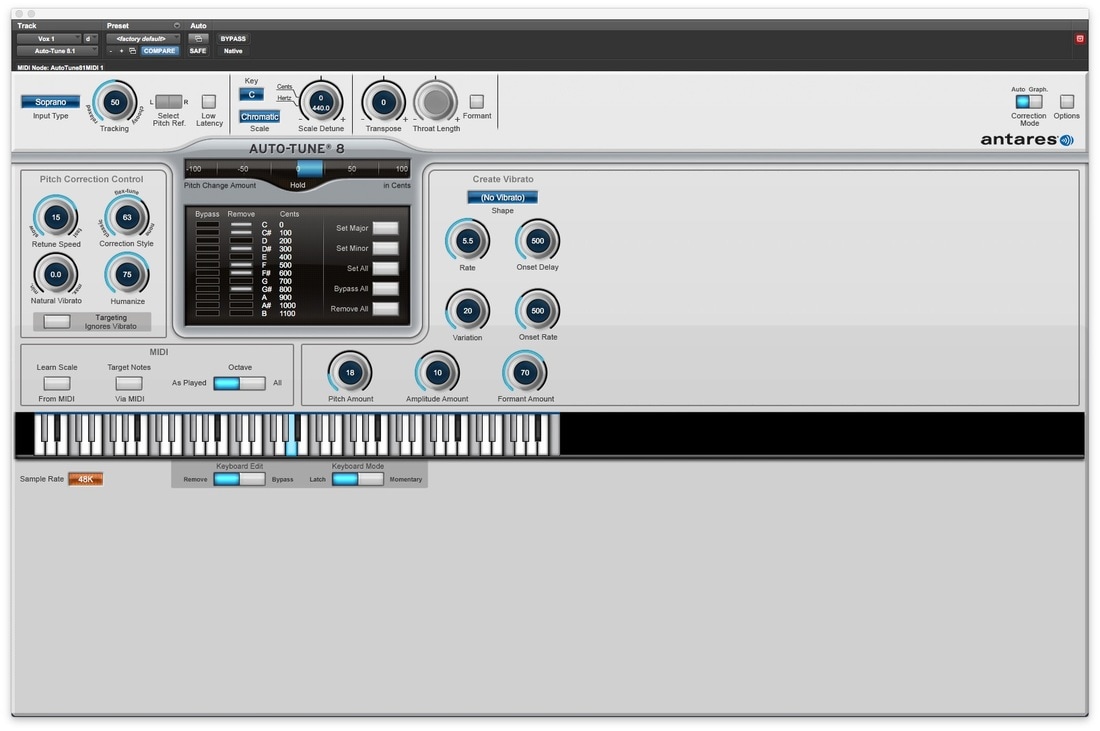
As you can see, the vocalist was a little flat on that particular note, which is why the blue meter is glowing to the right. If the note was sharp, it would glow to the left. It is easy to push the plugin too hard, and that results in the "T-Pain" effect, where the notes get retuned so fast that it sounds unnatural and robotic. Sometimes that is exactly the kind of sound that is desired, and other times it is not. In this case, I wanted a smooth and unnoticeable autotune effect. I set the algorithm to a moderately quick retune speed, and a fairly high "humanize" setting. Humanizing the algorithm helps to prevent the robotic sound mentioned above. Below is a screenshot of the keyboard interface that identifies which note is being sung in real time.

In this case, an E was being sung, according to the blue highlighted note. Sometimes the keyboard doesn't know exactly which note to pinpoint, which is why I have removed certain notes from the keyboard, as shown in grey. Removing these notes tells the plugin that these notes are not an option to retune the vocalist to. I effectively identified the key in which the song is sung, so that only the notes within the key are an option to adjust to. This step made a huge difference in the accuracy of the tuning. The unnatural wavering and incorrect notes that the plugin that were correct were eliminated, and the harmonies sounded excellent when blended all together. Here is the track below, check it out!
0 Comments
The next compressor I tried was the Empirical Labs Distressor. When set to a light compression setting, the pumping was very audible, which was very surprising to me. The soft hits were not brought very much, but the loud hits were compressed very hard. When applying an aggressive compression setting, The soft hits were more audible, but the loud hits were squashed to an extreme. If you want a squashed snare drum sound, this is one way to achieve it. Audio examples below:
The next compressor I chose was the Neve 543. When applying a soft compression setting, the compression really helped to beef up the low end frequencies and introduced a very slight pumping effect. When applying an aggressive compression setting, The snare sounded very punchy with some nice low end. This was a very natural sound in my opinion, and would cut through a mix very well. Audio examples are below:
Last but not least was the Daking 500 compressor. With this model, the user has very little control over the attack and release times, ratio, and whether or not to compress or limit the signal. For some, this would be an inconvenience For others, it allows one to focus on the sound rather than tweak a million different knobs all day. When applying a light compression, the higher frequencies seemed to be brought out, amounting to a very transparent sound. When applying aggressive compression, The frequency response was maintained, but a much more obvious pumping effect was heard. Audio examples below:
My compressor rankings within the light compression category are as follows:
1. Neve 543 2. Daking 500 3. Distressor 4. Chandler Germanium I chose the Neve 543 as best because I believe it added just the right amount of punch to the hits, and also added the right amount of low end to each hit. My compressor rankings within the aggressive compression category are as follows: 1. Distressor 2. Neve 543 3. Daking 500 4. Chandler Germanium I chose the Distressor as best because I believe it showcases a great pumping sound for when an engineer wants that kind of character. It wouldn't work in all cases, but when it's needed, it can deliver killer results with a lot of ability to fine tune the sound. Recording a wind ensemble within a concert hall is much different than recording a band in a studio. Everything from the way you position a microphone to the type of preamps you choose is different. Microphones are placed within the Hall, as well as in front of various sections of the ensemble. These are commonly referred to as "spot mics" and act as subtle reinforcement if needed. Most of the recorded sound will be comprised of the stage and hall mics. Mic position is key since phasing can quickly become a concern if proper distances and directionality are not maintained. When considering mic placement, sound localization should also be considered. It is important to decide how the direction we hear each instrument from within the mix should be handled, either mellow or aggressive and sharp (does the xylophone player sound like it is resonating from far stage right, or more in the center?.) A Decca tree configuration is a tried and true technique to capture great results. The Decca tree is a three omni-directional microphone setup. The first two mics are positioned in a spaced pair configuration, and panned hard left and right in the mix. The third mic is placed in the middle of the other two and slightly in front. This mic helps to provide additional localization of where the sounds are coming from. The tree is usually placed right behind the conductor, helping to achieve a decent blend between the sound of the hall and the instruments directly.
Sources: www.bedroom-recording.com/decca-tree.html davidmaslanka.com/recording-the-wind-ensemble-music-of-david-maslanka/ |
 RSS Feed